
Follow these steps to create a filter moodboard
- Create a moodboard as per usual.
- Add a name to the moodboard, specify the needed configurations such as the start date, expiry date, and template to be used. Click the options you want to make available for the moodboard.
- To create a filter for the moodboard, visit the filter tab on the top and add the criterias you want to be fetched for the moodboard.
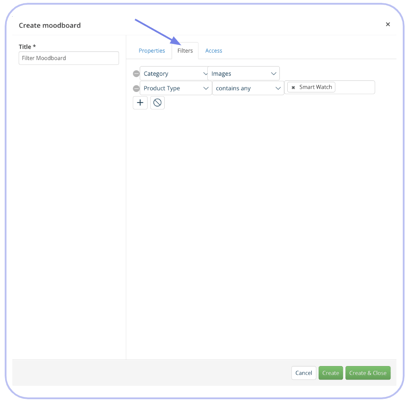
- Once you've added all the necessary configurations for the moodboard, press Create or Create & Close. The moodboard will appear in the moodboard menu with a small magnifying glass, as with Filter folders.
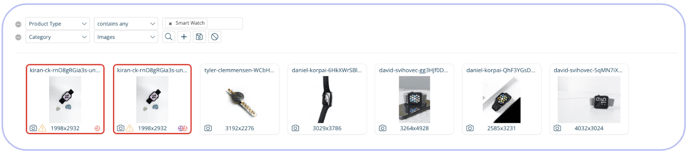
- When you visit your moodboard, you'll notice that it has been dynamically populated with assets meeting the criteria for the filters you added.
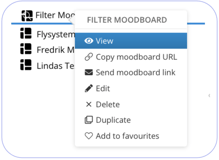
- You can now view or share the moodboard as usual.
NOTE: The Filter does not work on upload meaning, if using the moodboard for upload, the filter added will not automatically add the rights tagging to the assets.